Rolls-Royce and Bentley Forums banner
21 - 40 of 49 Posts
I wrote that post to warn someone unfamiliar with the use of floor (trolley) jacks, specifically on the front of a Shadow or Spur. They can and do slide off quite easily if the floor jack or car cannot move as it is being raised. On the front you are likely to destroy the radiator if it slips off. Different floor surfaces, different jacks can have different issues. Always use a good strong commercial type floor jack, not the little Chinese made ones. These are heavy cars. Sweep the floor before you jack the car, even a small washer can prevent the jack from rolling ahead as it lifts. It is safer to allow the car to roll ahead also just in case the jack sticks on something. Keep the jack wheels oiled or greased so it rolls easily, this can make a big difference in movement of the jack. Watch the jack pad on the suspension pivots carefully as you jack up the front. Do the same on the rear, it can slide off there too. Use a rubber or urethane pad or block of softwood on the jack. Don't rush, now that you know what to watch for you should have no problem safely jacking up the front or rear of your Shadow.
 
Discussion starter · #24 ·
Well, for Larry and a few others (I think Rob and Jim are following along over on the RROC forums), I made it through Day 1 without killing myself. Of course I haven't even started bleeding yet....

The car is up, and I managed to suck all the fluid out of the reservoir. Screens are in good shape. Calipers look like maybe I'll be rebuilding them after all.

What do you guys think?
 

Attachments

John, no sense in bleeding the system. Remember you have brake hoses to replace, acc to remove and perhaps calipers to split. You will always feel drag with rotors against the pads. Be mindful of the "M" wire springs that are on top of the pads. They point forward. The pads must slide smoothly within the caliper and cleaning the edges where the side tabs are (pad pins) is important so they slide. Check the rotors for score lines....they make have to be cut and the min thickness is stamped on the edge. It may be a good idea anyway because it could eliminate shudder if they are not flat. A smear of anti seize is acceptable. Remember do not overtighten the bleeder nipples or they will never seal...use a smear of antiseize here also. You should replace the return hoses to the reservoir since they break down also. Again...no point in filling the reservoir until the work is finished.
 
Discussion starter · #27 ·
Thanks Rob. I thought I needed to bleed because it was pressurized?

Do you have links to examples of the hoses I’m supposed to replace? I have a set of 10 I bought but I’m told there are 17 hoses. I still can’t get to 17 and I have no idea where these extra hoses are. Are they the high pressure braided lines?
 
John, the rest of the hoses will be for the height control. You can depressurize the system by opening the bleeders on the accumulator control valves or by pumping the brake pedal until both brake warning lights illuminate with the ignition key on and then another 20 pumps or so after they come on to be sure. This will not release any pressure in the height control system so crack the bleeders for the rams too. For the reservoir to brake pump feed hoses just use Gates 3/8ths ID heater or radiator overflow hose. It is composed of EPDM rubber which is compatible with DOT 3 & 4 (& therefore RR363) brake fluid. DO NOT use fuel hose, it will dissolve in DOT 3 or 4 based glycol brake fluids.
 
Discussion starter · #29 ·
Thanks Jim. I’ll look for the height control bleeders tomorrow, but I did do the brake pedal depressurization already before I got started, just in case. I just wanted to be sure.

I’ll look for some radiator hose. I know I have a length of fuel hose handy, but as you pointed out, can’t use it.

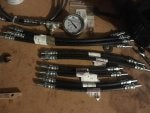
The hoses I have are:
Front Caliper (x4)
Rat-Trap (2 different lengths)
RH Rear Outer Brake
RH Rear Outer Brake & Height Control
RH Rear Inner Brake
LH Rear Inner Brake

What am I missing?
 

Attachments

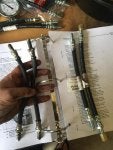
John, Use Introcar or FS as a hose guide because they have diagrams. There are 3 short high pressure hoses hoses that are braided, 2 are upfront and one in the rear for the height control system. An easy way to figure out is to trace the hydraulics and match up what you have and order the rest. When you install the 2 rubber front hoses to each wheel junction, make sure they are not twisted. the stripe along the hose can visually guide you. I find it easier to start all hydraulic fittings by hand when both sides of the fitting can float. They are easy to cross thread.
 
Discussion starter · #32 ·
Aha! Perfect. Thanks Alec. That’s what I needed.

All good advice. I always start threaded things by hand. Makes life much easier. I’ll make sure the hoses aren’t rubbing. Looks like that might be why they sprung a leak in the first place.

Can the little plastic floats from the reservoir tank be cleaned in denatured alcohol, or will it melt them?
 
Floats. Just wipe clean. They must be placed the same orientation when installed. The posts (carefull do not bend them) they slide up and down have a reed switch internally and when the magnet hits a certain area on the post it cause the switch to close , completing the circuit and alerting the warning lamp.
Use your cellphone for pics..it's your best friend.
 
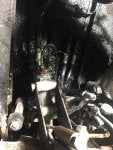
Yup. That looks like the left side. You will find a braided hose and that's high pressure also. You are looking at the height control valve which gets it's command from the short linkage attached to the side and the suspension arm. Most of those hoses may have a copper sealing washer and those should be replaced. Measure the internal diameter and find them on eBay.
 
Discussion starter · #38 ·
Okay I figured it out. Brake hoses are farther up above the exhaust. This is height control only. But they’re definitely leaking so they had to come out. Maybe my slightly saggy left side isn’t the struts after all!

...and I’m out of blanking plugs. So rear is going to have to wait. Guess I can do the front calipers and reservoir while I’m waiting on more plugs and parts. Front hoses I can swap pretty quickly and they’re all the same.
 
That's the way I usually work, from reservoir back to the rear Your reservoir is empty and without pressure in the system there would not be alot of fluid draining out.
 
Good job on the fuel filter (RROC Forum) If you notice rust around the edge of the brake piston caliper (there is a chromium plating on them) it may indicate the need for new pistons. Re-building calipers is easy. Simple internal O-ring, dust boot and retainer ring and a square O-ring between the caliper halves. Kelly has nice new stainless pistons that I wish I had installed in mine at the time.
 
21 - 40 of 49 Posts